
Setting up our first VPC and Connecting to our Distributed Transit Gateway in VI WLD
In the last blog, we have successfully deployed our first VNA clusters and created our first distributed transit gateway.https://vxlearners.com/2026/07/27/setting-up-a-vna-cluster-in-vi-wld-for-distributed-transit-gateway/. In this blog, we will provision our first VPC and VPC connectivity profiles. We will also provision our private subnet, TGW private subnet, and external block in VPC In future blogs, we will update NSX Cloud in the AVI controllers to use NSX constructs, and we will also integrate all these components with VCF Automation 9.x
Diagram
In our environment, we have one management domain where all management components like SDDC Manager, vCenter, NSX Managers, and VCF fleet components of VCF 9.x will be deployed, and one workload domain where application-related VMs will be deployed. In the management domain, we have four ESXi hosts with vSAN OSA (Original Storage Architect).
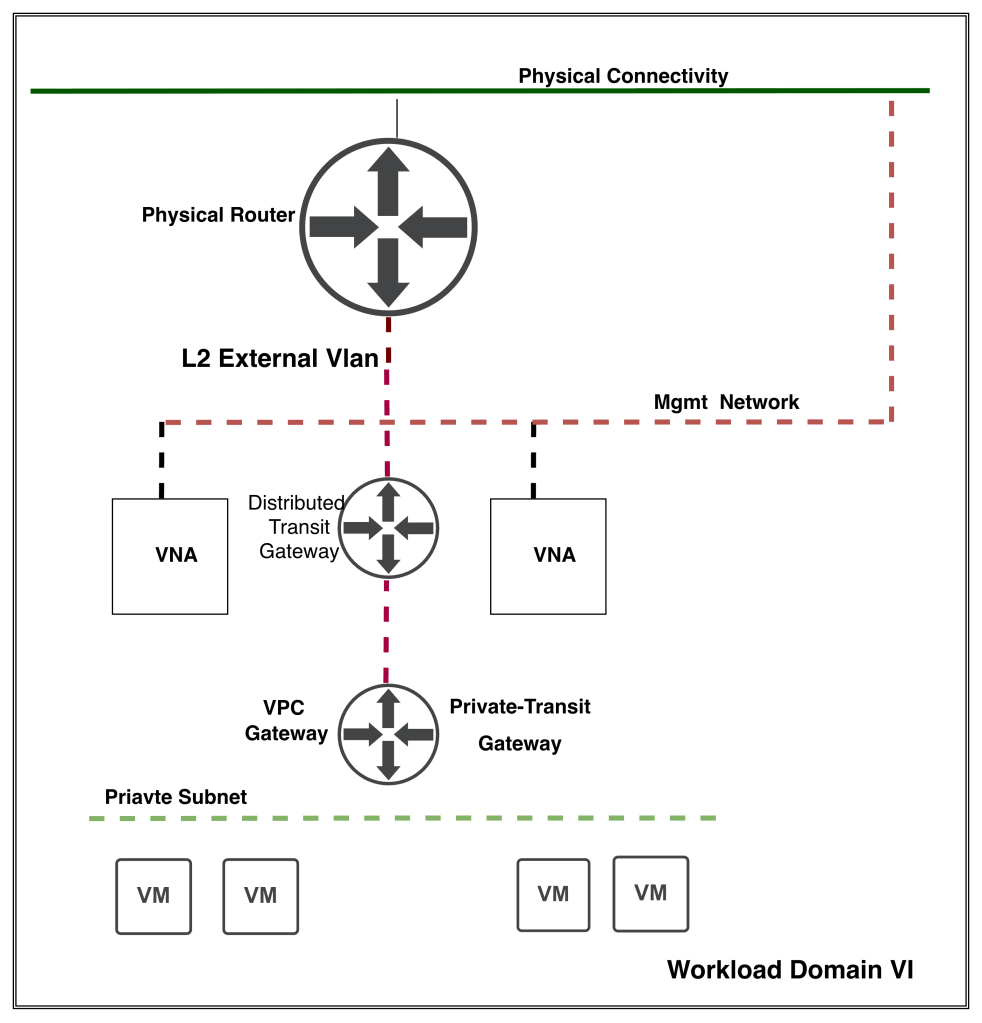
In VCF 9.1, the distributed transit gateway services are not limited to DHCP only. Using VNA clusters, DTW provides services such as custom NAT and L4 load balancing. In distributed connectivity, we don’t need to rely on extensive routing protocols like BGP, OSPF, or static routing protocols.
In this blog, we will configure different subnets required to create our first VPC. It is composed of a VPC private subnet, a TGW private subnet, and an external subnet. The gateway of the external subnet resides on physical network appliances. All stateful services like NAT and DHCP will use IP ranges from the external network.
Configuration
In the previous blog, we have already deployed our first distributed transit gateway named “DTGW.” In order to verify, navigate to Networking > VPC Connectivity > Transit gateway.
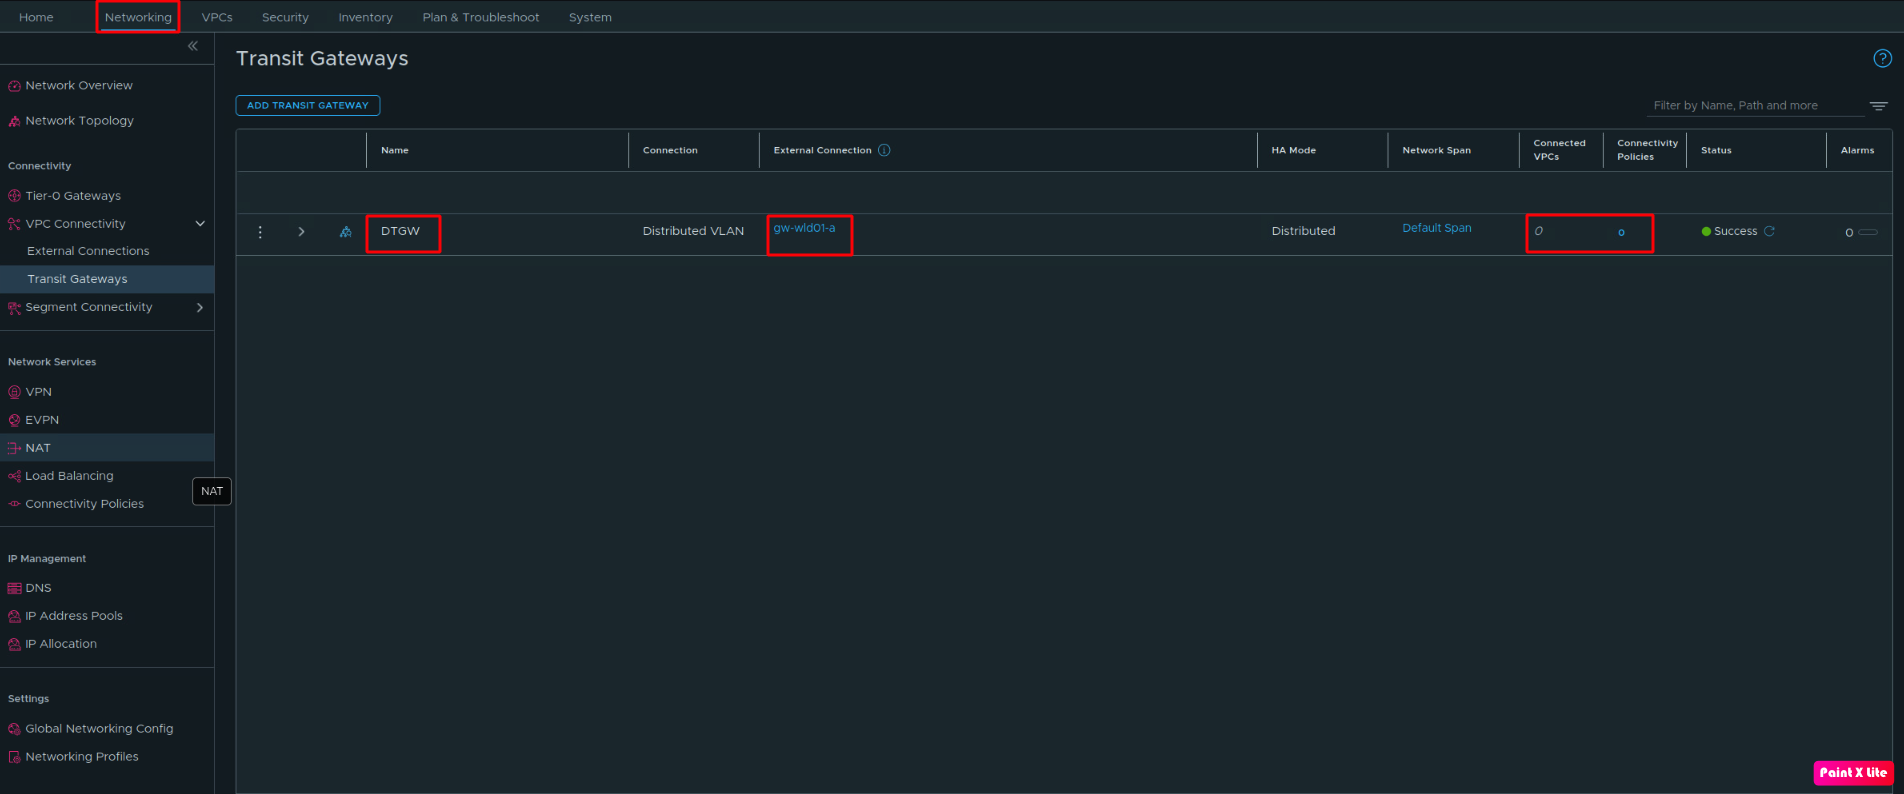
The transit gateway is successfully deployed, and it has no VPC and connectivity profiles attached. The external connection we already created in the last blog, which has VLAN-24 with CIDR 10.1.8.128/25 The gateway for this VLAN is configured on physical switches.
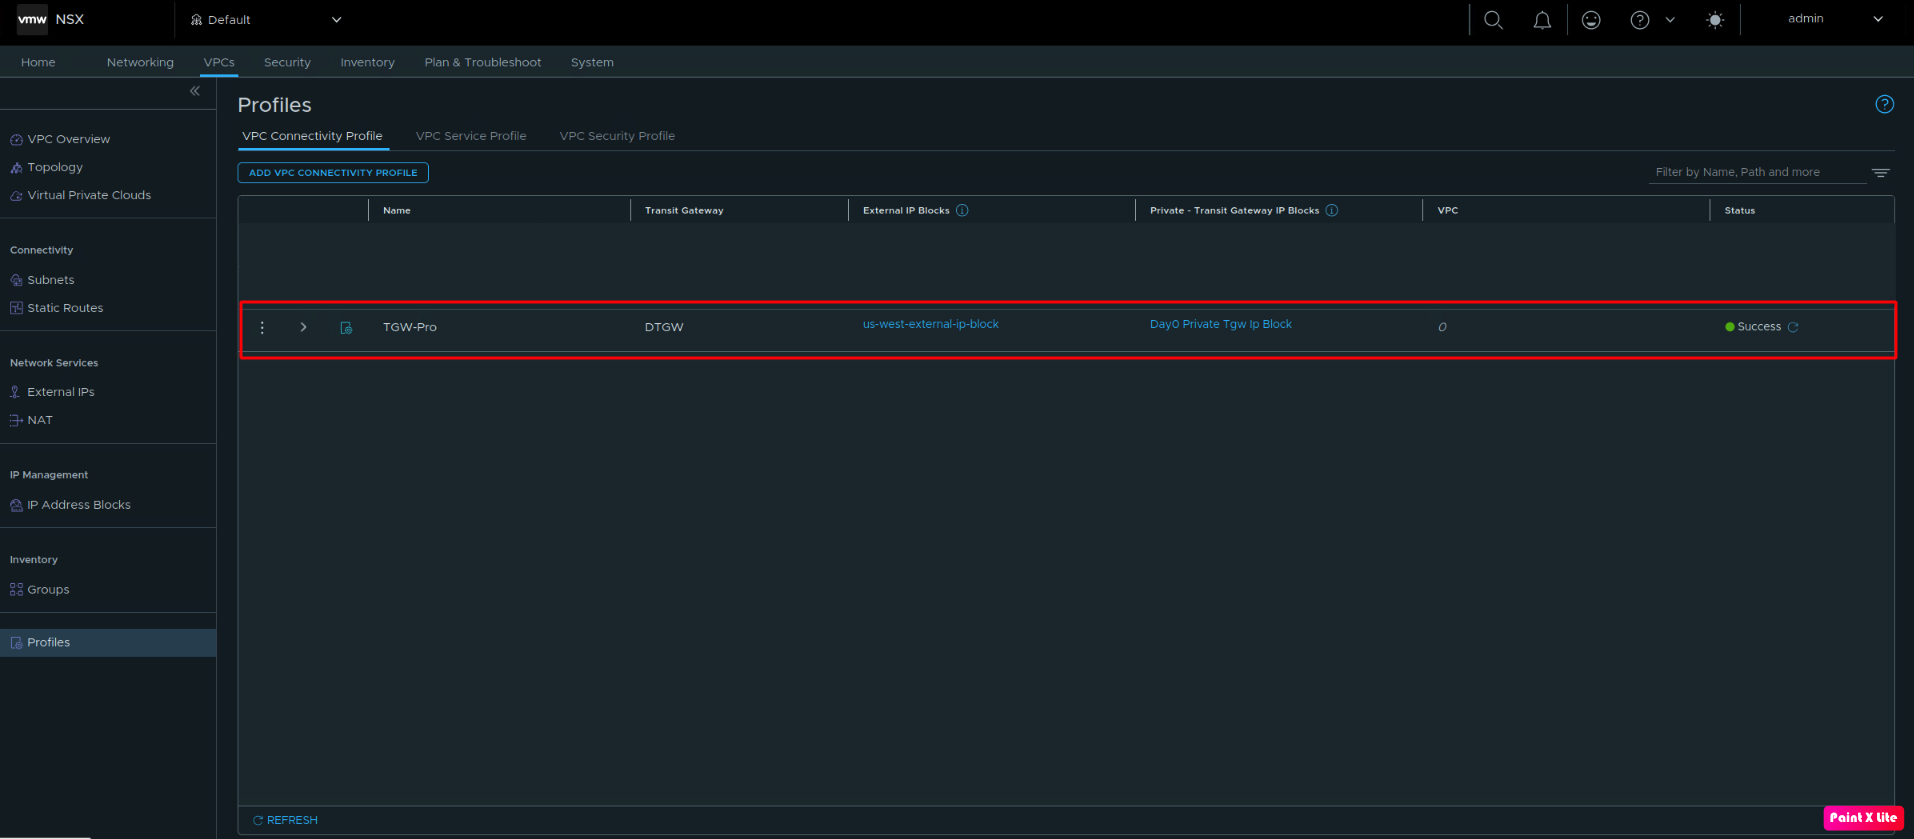
Let’s create our first VPC connectivity profiles. In order to create our first connectivity profile, let’s navigate to VPC < Profiles < VPC Connectivity Profiles < Add VPC Connectivity Profiles.
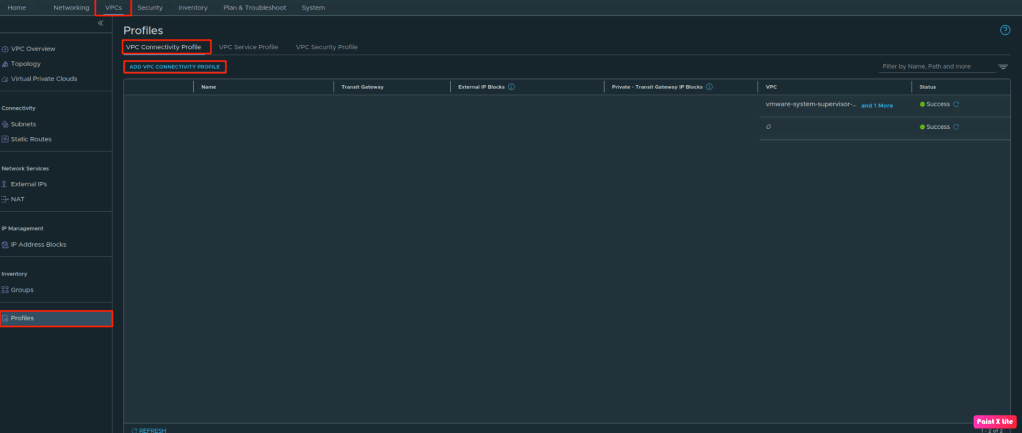
To add a new VPC profile, we need to provide details such as the name, distributed transit gateway, external IP block (which is the VLAN-24 CIDR), private transit gateway, information about the VNA cluster (discussed in the last blog), the IP subnet to use for outbound NAT, and additional relevant details.
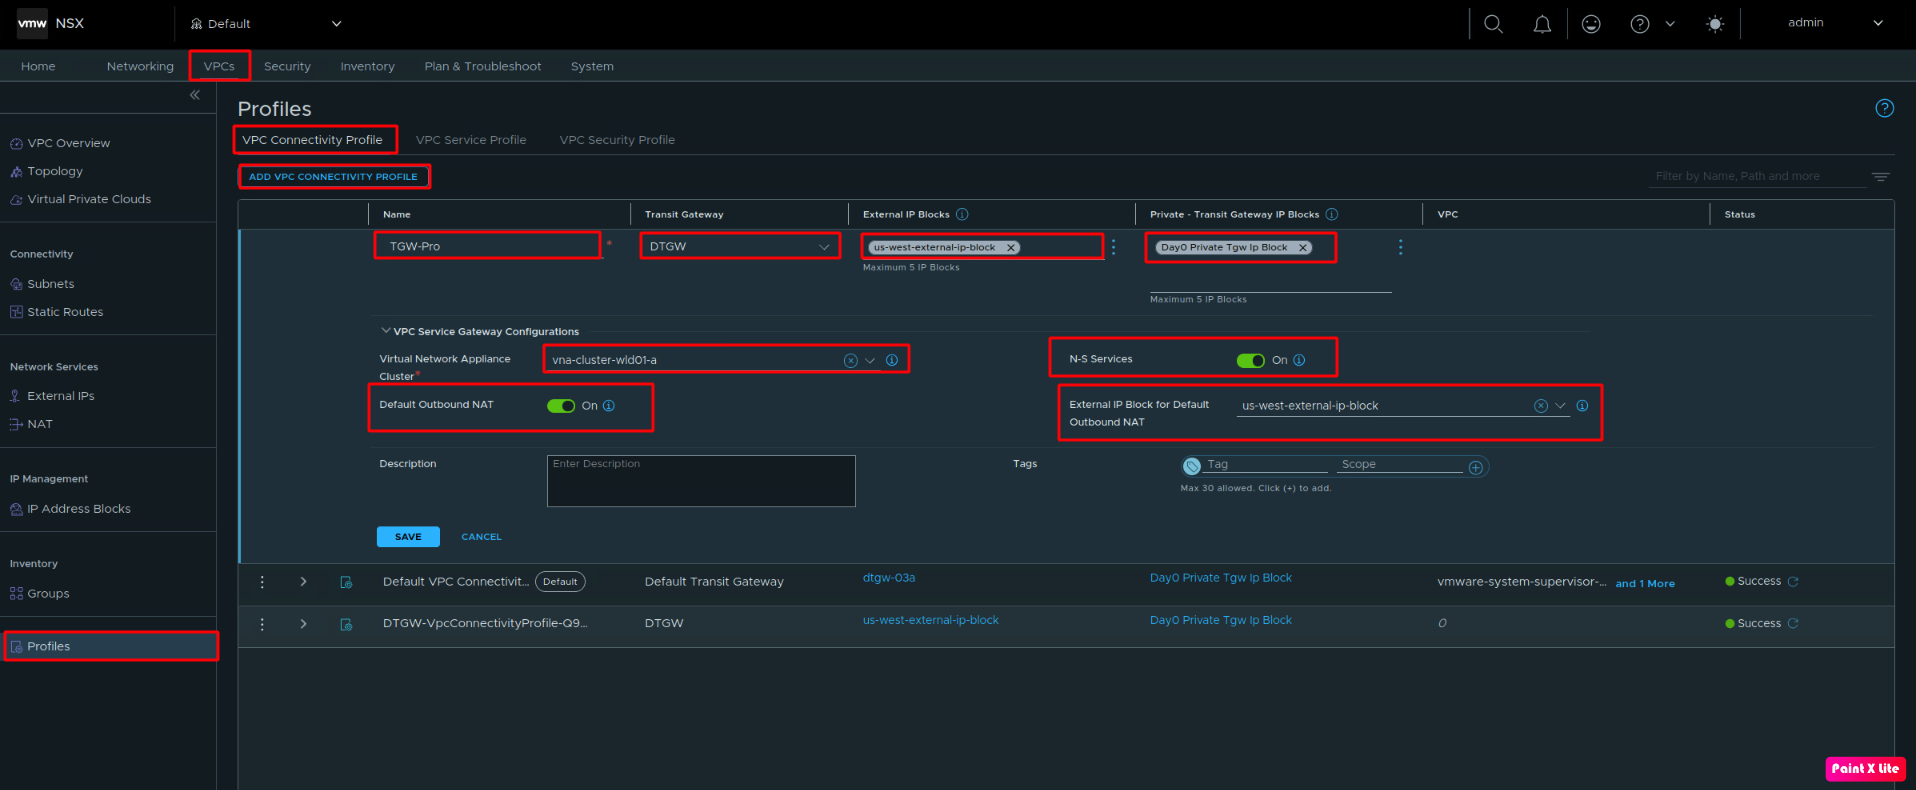
In VPC connectivity profiles, we can also specify different IP blocks for outbound NAT, enable or disable Outbound NAT. In case we don’t want to enable N-S services, this has to be enabled to be disabled from VPC connectivity profiles. Whatever the stateful services you are going to run, all the services will get an IP address from VLAN-24. In the physical environment, our private IP block, the private transit gateway IP block, will not be visible. Deploying a VNA cluster will eliminate the dependency on routing protocols like BGP, static, or OSPF.
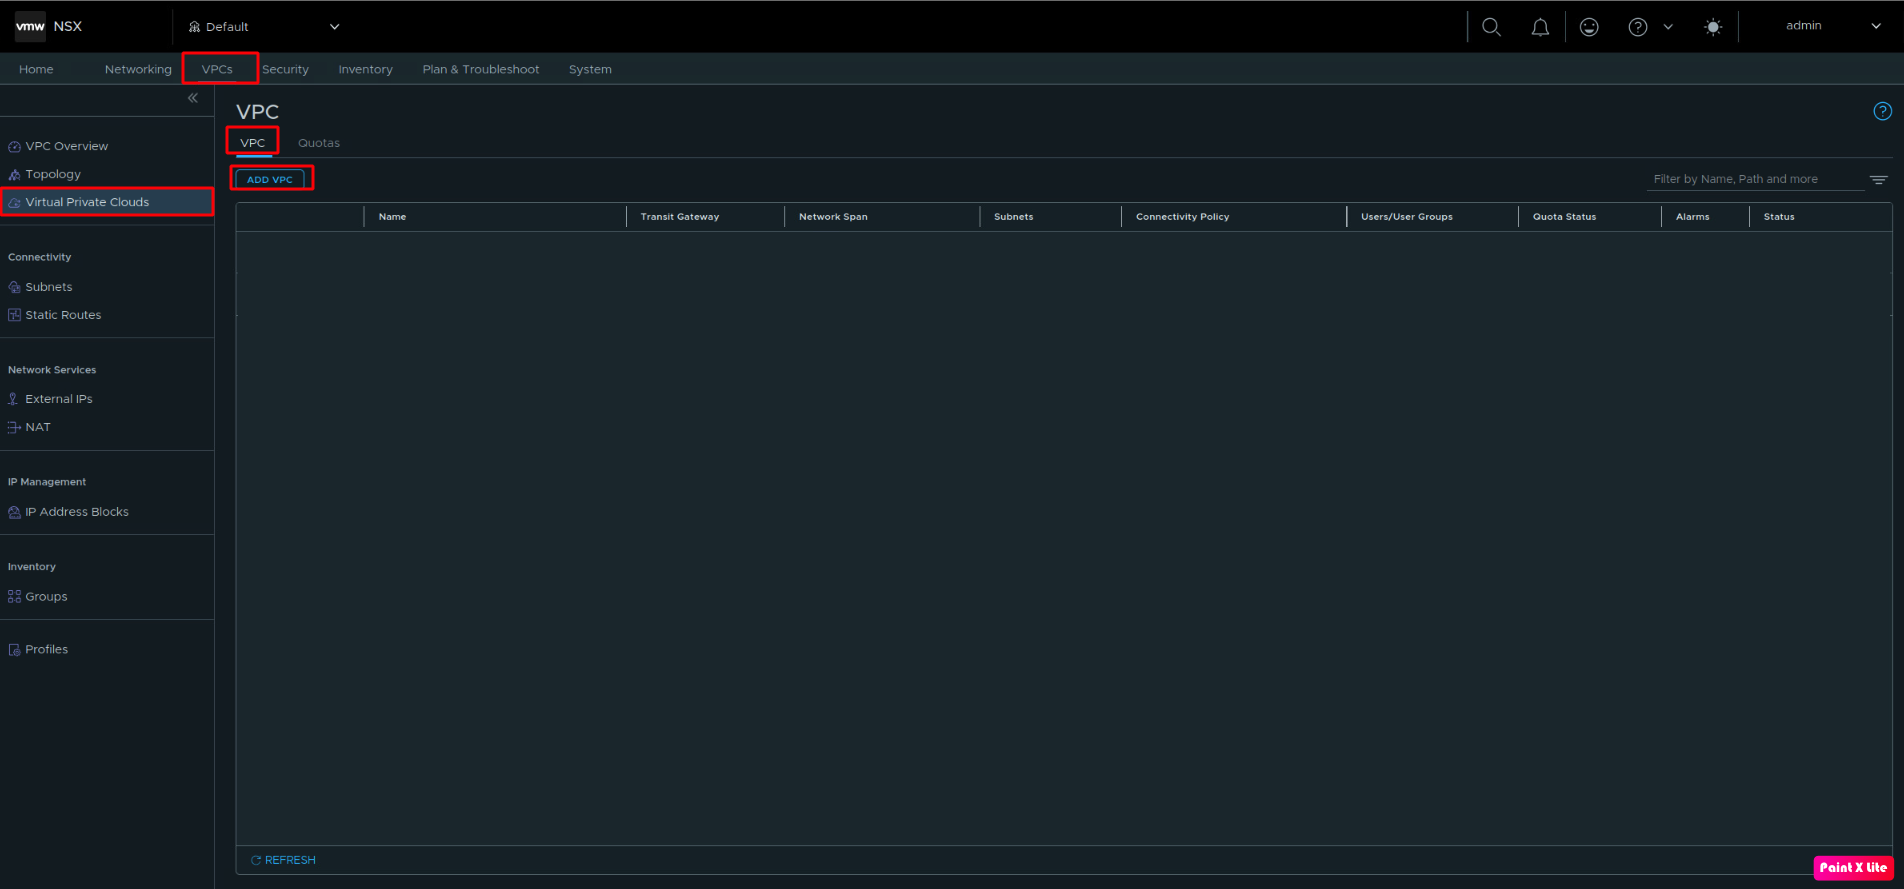
Now, when our VPC Connectivity profiles are deployed, let’s create our first VPC in the default project. To create a new VPC, click on VPC < Virtual Private Clouds < VPC, and click on Add VPC.
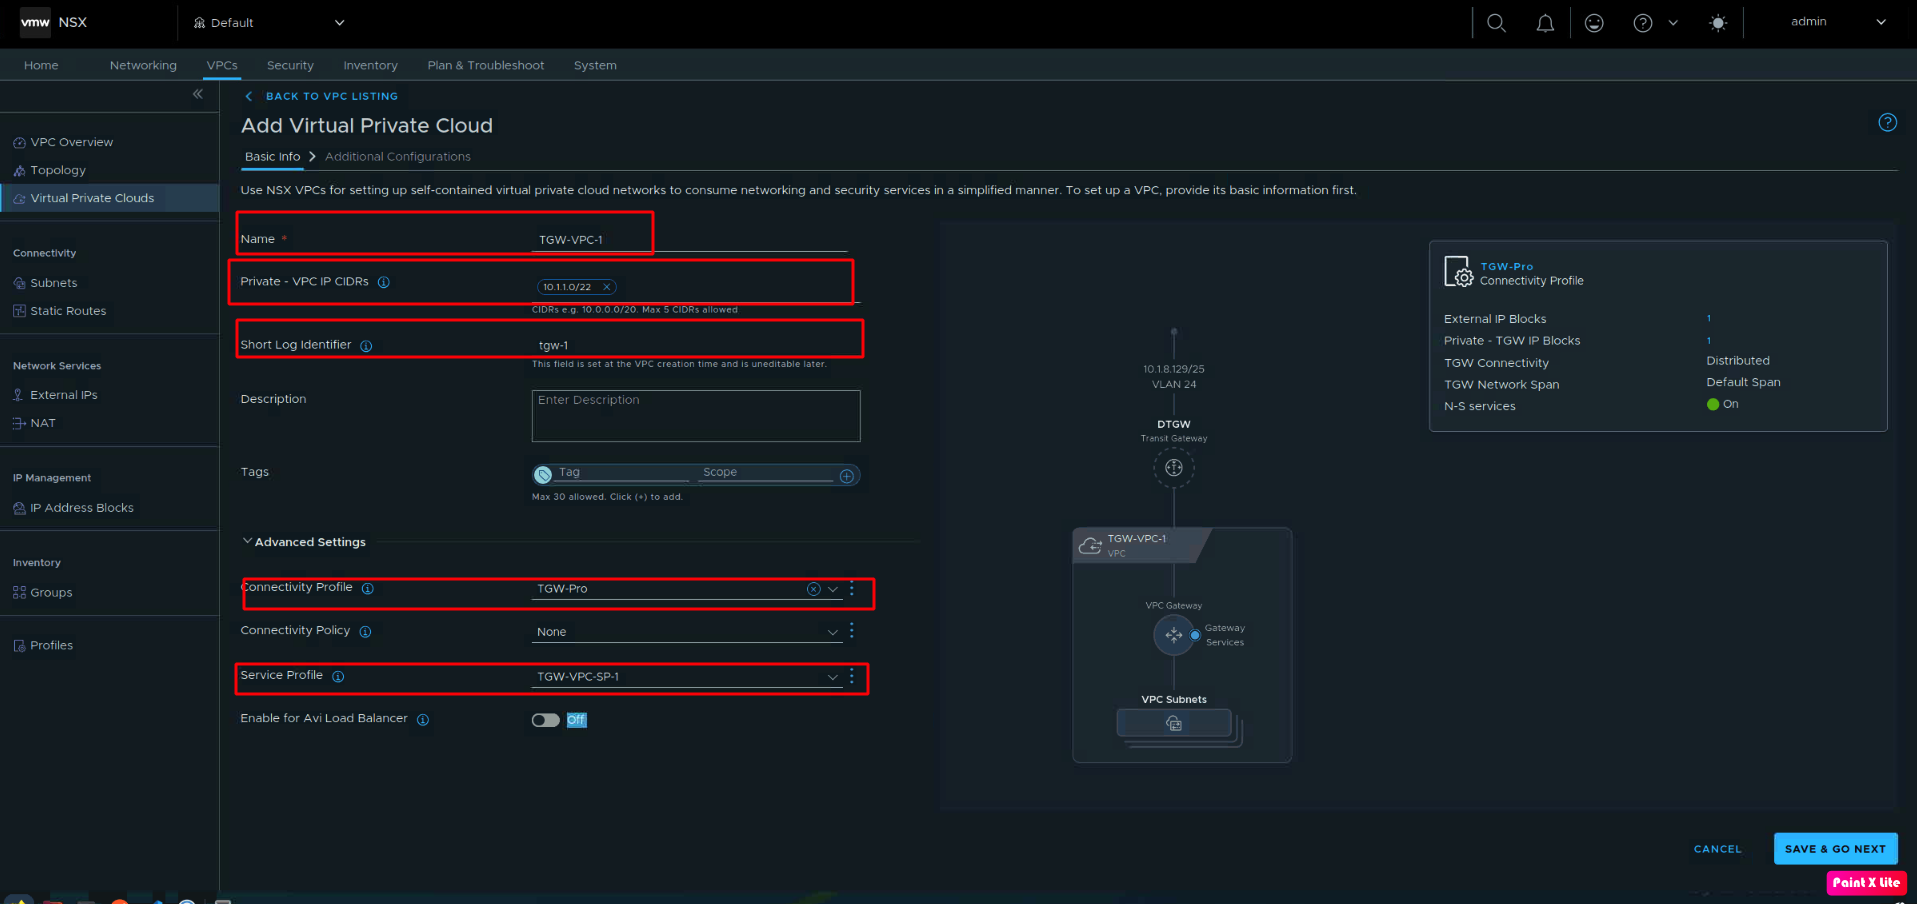
Now to create a VPC, we need to provide details like name, private VPC IP CIDR, log identifier (to identify logs for this VPC in VCF operations for log or any other external log provider), connectivity profile (already created), and service profile (creating our service profile in the next step). Our environment is not integrated with AVI Controllers; therefore, we can’t enable the AVI Load Balancer.
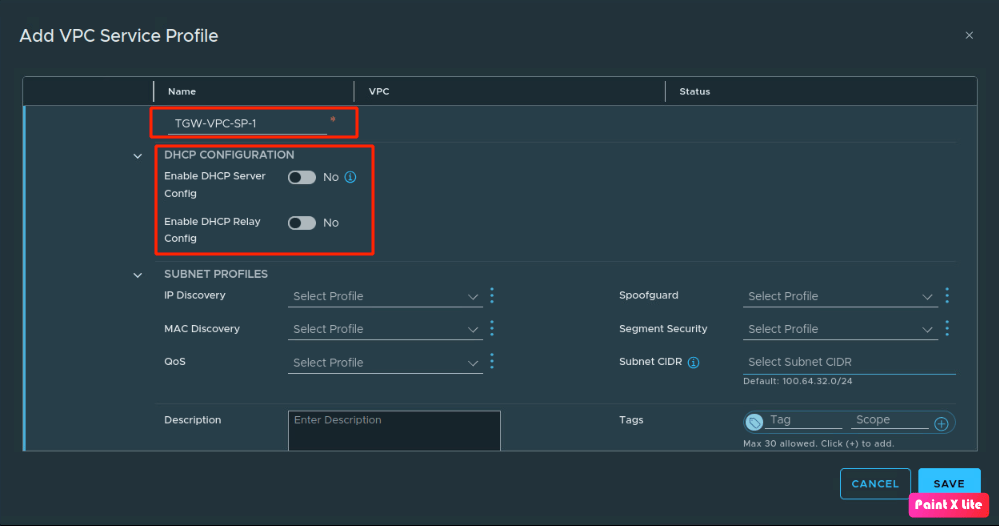
Now, let’s create a service profile, which allows us to enable DHCP server configuration or DHCP relay configuration (in case we have an external DHCP server), and subnet profiles like MAC discovery, IP discovery, and so on. Service profiles can be created from VPC < Profile < Service profiles. However, in our case we are creating in the VPC itself.
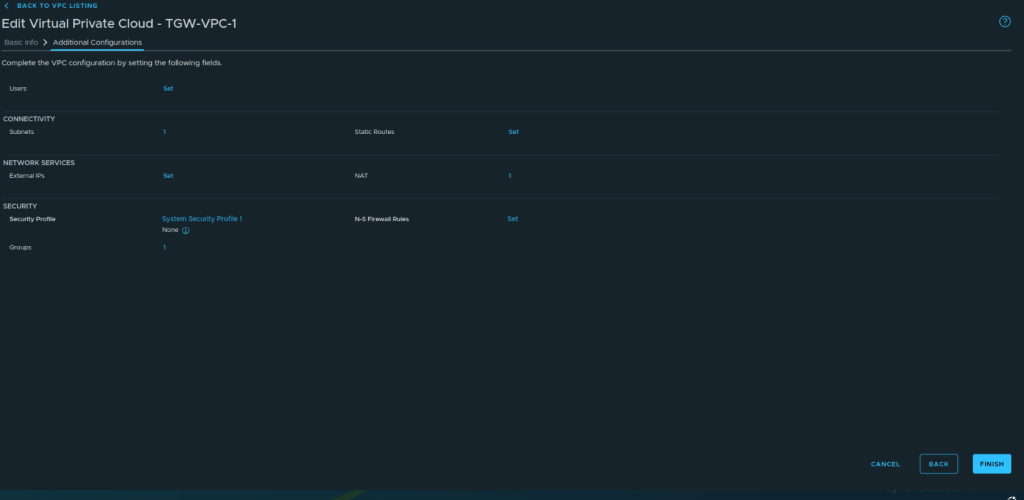
Now, in order to complete the configuration of VPC, we have to provide details about users, groups, and so on, which is out of scope of this blog.
In the next step, we will create our first subnet of /26, which will be a range of private IP subnets (10.1.0.0/22). To create our subnet, navigate to VPCs < Subnets < Select the VPC < Add Subnet.
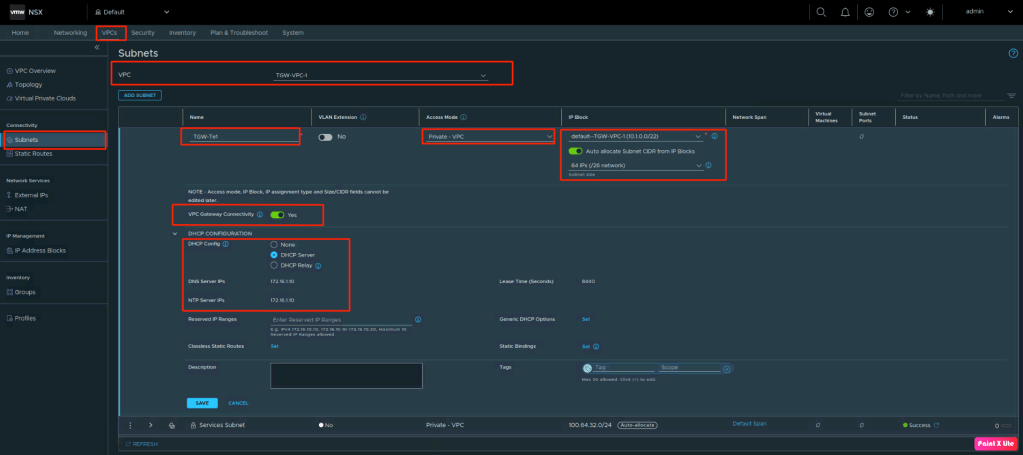
To create a VPC subnet, we need to provide details like the name of the subnet, access mode, IP block, VPC gateway connectivity, and so on. A service subnet is created by default, which will allow us to connect the VPC with the VPC Gateway.
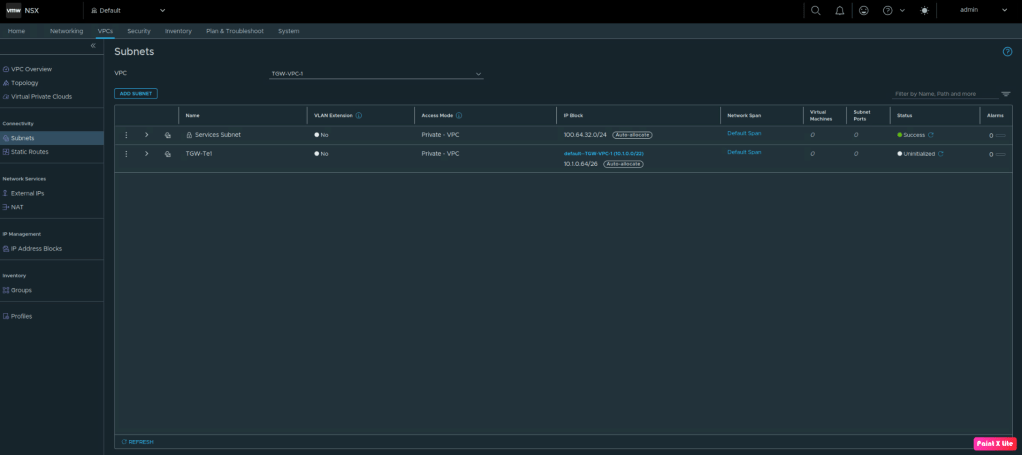
In next blog, we will create VM and allocate IP address to it from this subnet and verify the network connectivity.
Summary
In the first blog, we have successfully deployed our first VNA clusters and created our first distributed transit gateway. In the this blog, we will provision our first VPC and VPC connectivity profiles. In future blogs, we will update NSX Cloud in the AVI controllers to use NSX constructs, and we will also integrate all these components with VCF Automation 9.1.


Leave a Reply