
Introduction
This blog will discuss on how an IPS and IDS for East-West traffic will work in NSX-T. The blog also elaborates on steps required to enable and configure IDS/IPS through Terraform and the necessary steps required to configure on the NSX-T Manager to protect the VMs on the host enabled for it. In order to add more favours, this blog will also discuss complete traffic flow when IPS/IDS enabled on a cluster or a standalone host along with it all configuration related to it will be done via Terraform.
Diagram
In our environment, NSX-T managers are already deployed, and one cluster “RegionA01-COMP01” is already prepared for NSX-T (Networking and Security) consumption and necessary vibs for IDS/IPS functionality were installed during this process . However, the service module required to run vSIP is already enabled (Used for Micro-Segmentation). IDS/IPS sits on top of this service module, therefore, no separate system module will enable for it. We will discuss more about in below sections.
Below diagram depicts, how traffic will be analysed it is allowed by distributed fire-walling.

NSX IDS/IPS functionality monitors network traffic on a host for suspicious activity by comparing the traffic against signatures, these signatures will be push by NSX-T managers when IDS/IPS functionality is enabled . We will discuss about this step in more detail.
Traffic Flow
In order proceed with IDS/IPS functionality, it is imperative to understand all the steps NSX-T performs to validate the IPS/IDS traffic. We haven’t changed the default behaviour of the default rule.

All the traffic has been allowed by the “distributed firewall”. As the vSIP module already initialised on the ESXi host, the traffic will be verified on the three tables “Context Table“, “Flow Table“, “Rule Table“, and “Address Sets“. If it is a new connection, the entry will be created in the connection table. If any of the table has the entries for the traffic generated by the Guest VM, then it will sent traffic to either IDPS Engine, Content Engine (For URL filtering), or to vDPI Engine for further analysis.
After enabling IPS/IDS feature on the NSX-T, the traffic will be forwarded to slow path to further analyse it against the signatures pushed by managers to the ESXi hosts depending upon the IPS/IDS rules and policies. In this blog, we will configure IDS/IPS rules and policies via “Terraform“.
Configuration
In order to start the configuration for IPS/IDS, we need to enable the feature on either the standalone host or on compute cluster.
NB: Necessary licences have been procured and applied on the NSX-T managers.
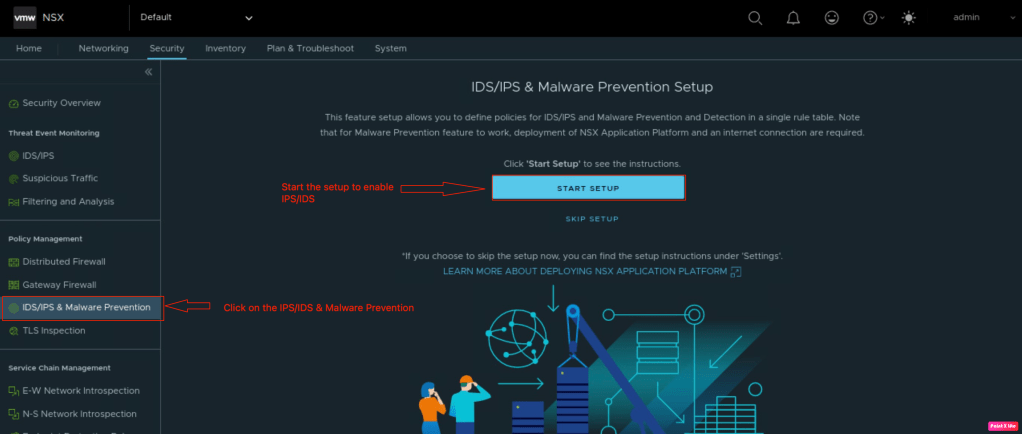
In order to enable the IPS/IDS, navigate to the Security >> IDS/IPS & Malware Prevention and click on “Start Setup” to enable the feature.
In the second setup, we need to enable IPS/IDS on either for east-west traffic or for north-south or we can enable it for both and click on “Next“.

In case your NSX-T managers are behind the proxy server you need to provide the proxy server details.

In the next step, we need to download the signatures to leverage the functionality of IDS/IPS. After the successful uploading of the certificates, click on “Next”.

In the penultimate step, we will enable the IDS/IPS on either a standalone host or on the compute cluster.
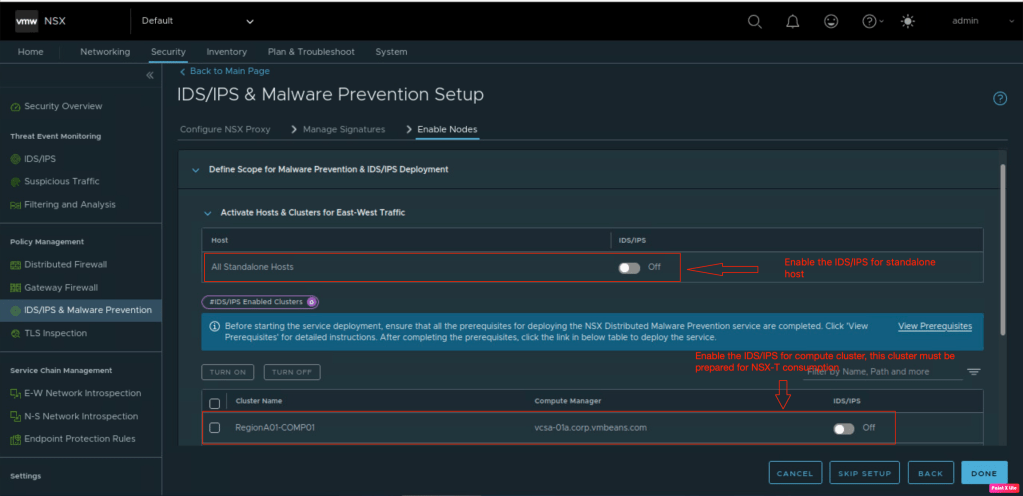
In the last step, lets verify that the functionality has been enabled on the compute cluster and click on “DONE”.

Necessary software vibs will be installed on the ESXi hosts when it will be prepared for NSX-T “Networking and Security” or “Security” as we discussed. In this step, we will verify that the system module for vSIP is already initiated on the hosts enabled for IDS/IPS..
In order to verify it, we logged into the ESXi host via “ssh” and use command “esxcli system module list | grep nsx“.

Now it is the time to start building our terraform scripts to configure required policies, rules required for IPS/IDS to work.
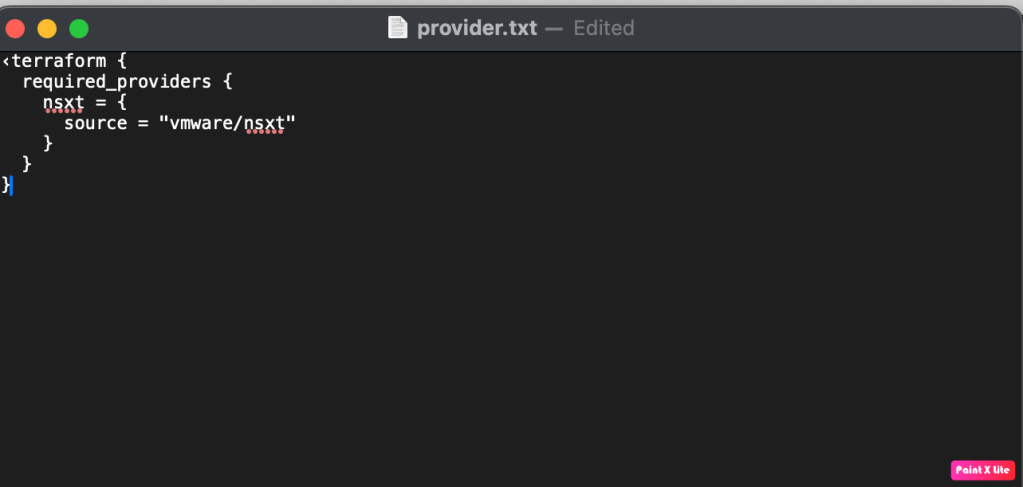
We have already discussed about Terraform many times, using the same knowledge we can embark in creating our our first terraform file called provider.tf. This file includes all VMware/NSX-T provider version management PC will download.
Now it is the right time to introduce another file called variable.tf which includes variables like NSX-T manager username, password, and many more.

Last but not the least, lets start creating our last terraform file called main.tf. This file includes all information in order to configure IDS/IPS policies and rules.

In the above screenshot, we are creating one security group called as “Web_Server” where the policies will be applied. NSX-T Managers will push required signatures only to those hosts which have Web-Server VMs.
In order to create IDS/IPS rule, we need to configure Intrusion Service profile.
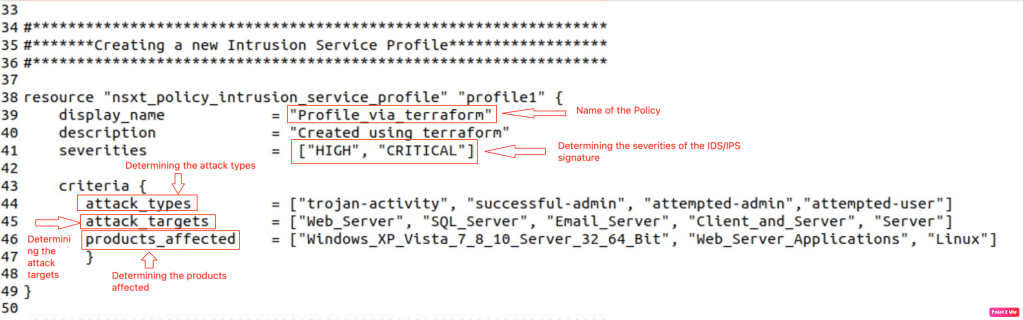
In the above screenshots, we are defining below parameters along with the severities to include only “High” and “Critical” Signatures.
–> Attack Type: To determine which attacks will be evaluated by the policy.
–> Attack Targets: To determine traffic of which servers will be analysed. In our
–> Products affected: Operating systems on which attackers can generate attacks.
In the next step, we will configure IDS/IPS Policies. In this policy, we need to define name, description, whether we need to lock it, and it is a stateful policy.
Under this policy, we can create multiple rules. First rule which we are creating is named as “rule1”, destination group (Created in pervious step), action we need to perform like “Detect”, Detect & Prevent” and ids profile.

So far we have done all the hard work, now lets break the ice and start implementing the IDS/IPS policy via “Terraform”
To make a start, we need to initialise the terraform on the management PC.
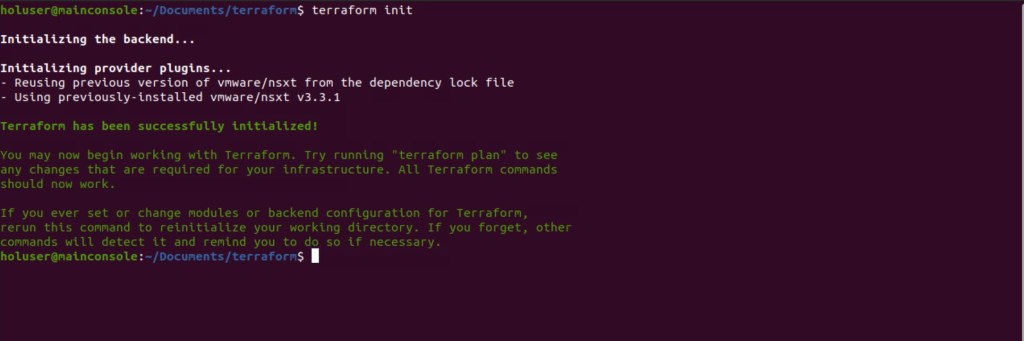
In this blog, we will run the “Terraform Apply” directly on the management PC to make sure necessary configuration will be applied on the NSX-T managers and it will push the configuration to the hosts prepared for IDS/IPS.

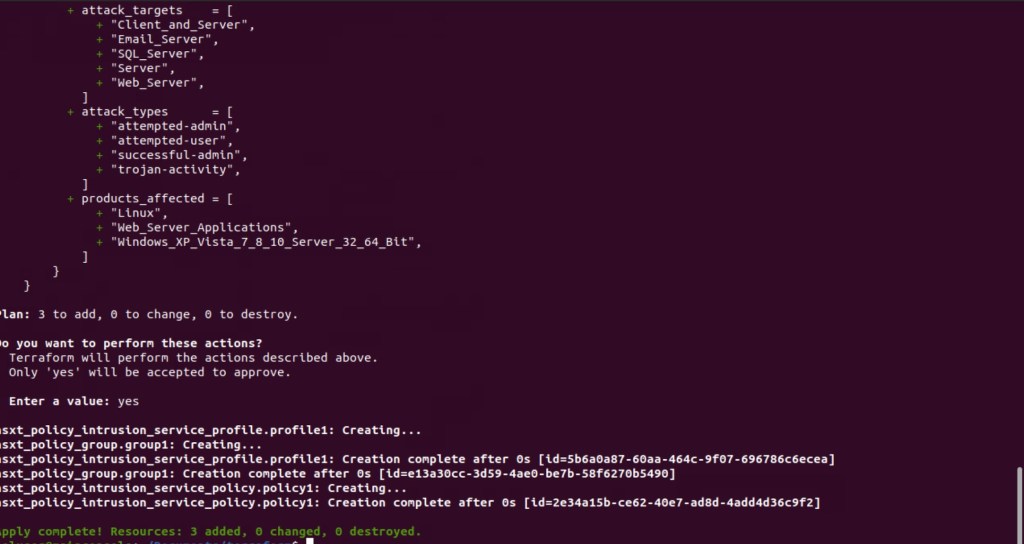
As per the above screenshot, three resources have been added successfully in the NSX-T manager. In the next section of the blog we will verify IDS/IPS policies.
Validation
In this step of the blog. we will validate the configuration of IDS/IPS policy created by Terraform on the NSX-T Managers. We have already validated the enablement of IDS/IPS on the transport nodes. Let’s break the ice and validate the creation Web Security Group.

It is evident that the Web security group has been created successfully, which contains all “WEB” servers“.
In the next step, we will validate the IDS/IPS Service profile created by the Terraform.

New service profile has been created as per the requirements.Lets validate the list piece of the puzzle which is IDS/IPS rule for East-West traffic.

Summary:
In this blog, we have successfully talked about “how IDS/IPS” works” in the NSX-T along with that we talked about traffic flow. In order to enhance our knowledge. we enabled IDS/IPS on the compute cluster already prepared for NSX-T Networking and Security. We also demonstrated the creation of NSX-T IDS/IPS profile, Service policies using “Terraform“. However, we were not able to evaluate the policy against the attacks.


Leave a comment